
Did a little digging around the antique mall and came across 4 older saw at very reasonable prices, all between $2-$7. They all need a little clean-up including an Evaporust bath, sanding any deep stains on the blades (maybe reveal any etchings?), repair/refinish the handles as needed and then it’s off to the sharpener. While they’re out to be sharpened, I need to re-organize the workbench, it looks awful as seen. More updates to come.
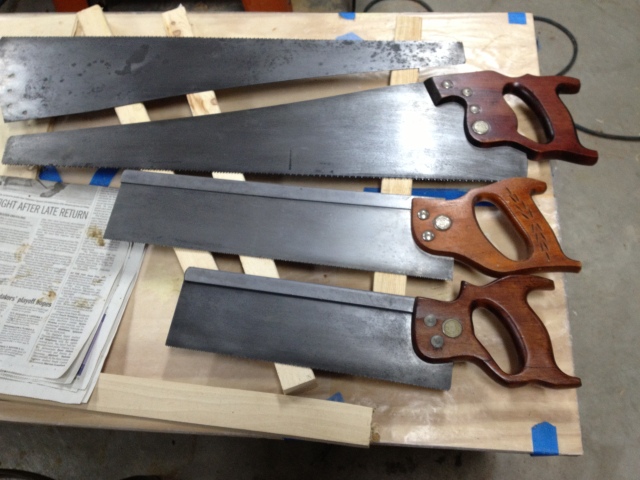
 Here are some of the saws after being cleaned up. The blades were all scraped with a razor blade to removed surface rust and gunk. Each was given a 24 hour bath of EvapoRust and finally I hand sanded the blades, progressing from 400 through 600 grit. I was unable to save the etch on the Disston but found a method I may try later to restore it as it is visible still on the saw. The Disstion is a D-20 skewback cut 10ppi crosscut. It is the top saw in the photo below. There is some pitting left on the blade but not enough to effect how it cuts. I still have to put the final coats on that handle and then re-assemble. All will then need to be re-sharpened. But now I have 4 nice users for a grand total of $19.

Good afternoon Steve.
My husband and I were getting ready to leave to purchase a bunk bed when we came across your tractor beds….. Oh my. You did an excellent job. We were wondering if you we’re selling a material list and bunk bed plans. We would like to get an estimated cost before we venture in. We would like to build this for our son who is in love with tractors, that is a mild description. He sees one everyday at the same time bring hay to the cattle across from us, and always acts like it is his first tractor he saw. We would appreciate your help. You can email us at rholmes1211@gmail or even call us at 540 271 7251. Thank you Steve.
Howdy,
Here is where I found the original information:
http://woodgears.ca/bed/bunk_bed/tractor.html
There are links on that page that show a material and cut list for a standard bunk bed, but with the ladder on the side. Following his lead, I moved the ladder to the foot of the bed to incorporate into the tractor “grille”. I used his measurements, just moved it around is all. The hardest part was the cab and wheels as there are no directions or cut list. I just eyeballed it for the cab measurements. For the wheels, I used the measurement of the front wheel of a Ford Focus and for the rear I used a wheel size from a Dodge Durango. It’s just what I had in my driveway to model after and they came out fairly proportionate to one another.
I hope that helps, but please feel free to ask any other questions you’d like,
Steve